Category Archives: Crafting

Crafting and DIY blog post showing step by step sewing, crafting, and creative ideas for home and family

How to Wash your Window Blinds

How to wash blinds sleaning clean blinds

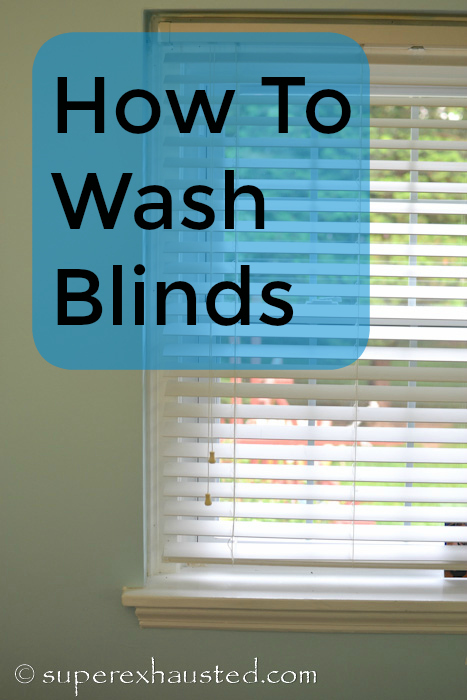
How to Wash your Window Blinds: We are in the process of redoing my daughter bed room.  Which include repainting, re-carpeting, and all new to us furniture.  The one thing that we did keep in her room was the white blinds.  I need them to match all the freshly painted and new items. I do dust them or I tell her to dust them .. but they never look great.  So a friend suggested washing them.

My blinds are 2″ wide composite blinds not wood.   Our binds are not going get distorted by water.

Disclosure: If you have wood blinds I would proceed with caution (make sure it is a hot day so they dry quickly and will not warp.  Because wood if it is wet too long will absorb water and warp.  I am not responsible if you destroy your blinds.

If you have older blinds why not give washing them a try because they might come out fantastic like mine.

How to Wash your Window Blinds:


  1. Dust blinds
  2. Choose a hot day with the sun-shinning let the outdoors do the work  -AKA summer project
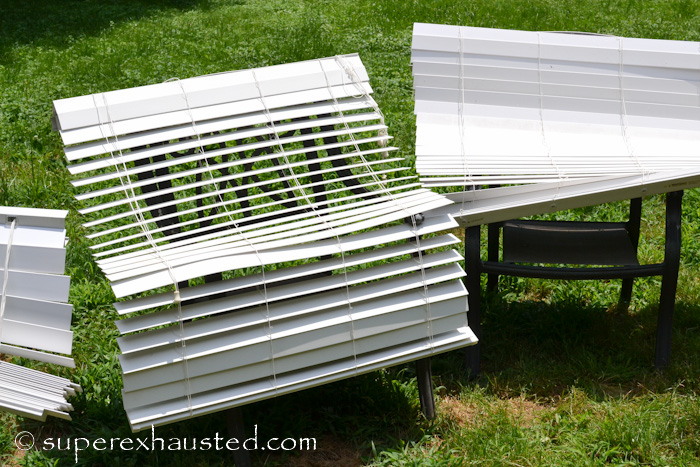
  3. Place sturdy patio chairs or a 2 ladder in the sun to place the blinds onHow to wash blinds sleaning clean blinds
  4. Fill a clean bucket with hot soapy water (dish washing detergent)  and a large clean/new sponge
  5. Take down blinds from window bring out side placing top over back of chair
  6. Make sure blinds are full extended (you will need 2 people) one to hold one to lower the binds, so you can get to every blind while washing them- allows them to dry and dirt to not pool under them
  7. With a hose spray down the blinds with waterHow to wash blinds sleaning clean blinds
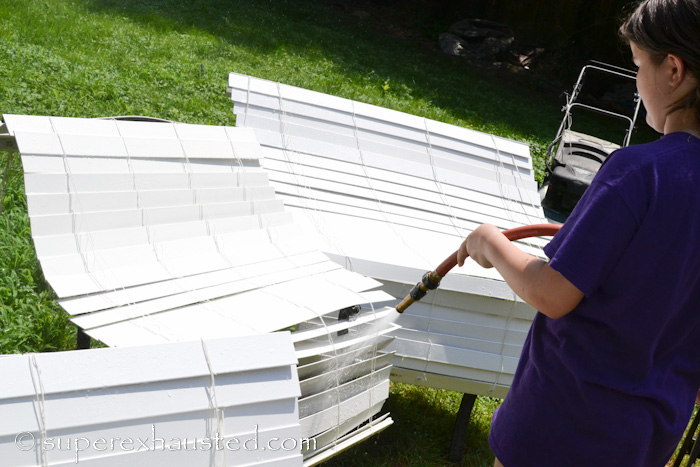
  8. Then wash each blind by hand with the soapy water & spongeHow to wash blinds sleaning clean blinds
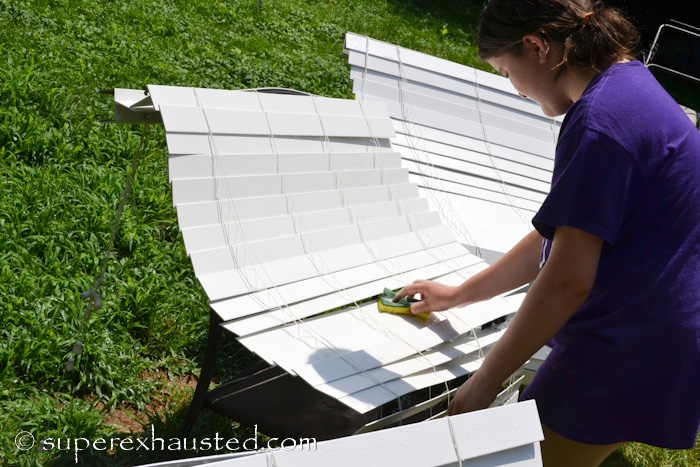
  9. Rinse and repeat if necessary
  10. Allow to dry in sun (towel dry first if you are worried about hard water spots)
  11. Be sure to tilt the top of the Blind at an angle so the water can drain out as it drys
  12. When blinds are complete dry rehang blinds..
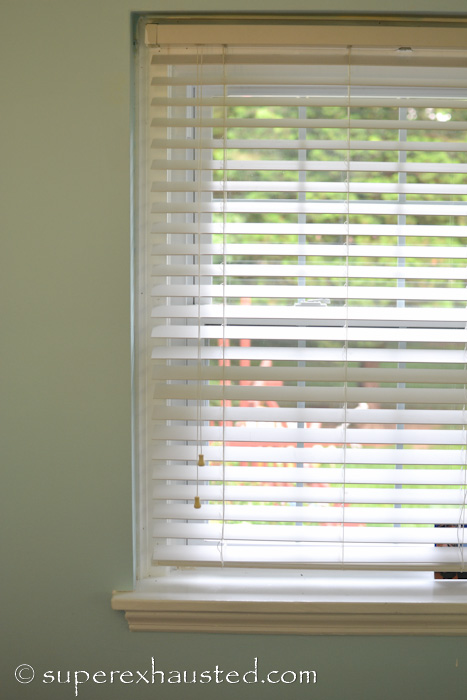
How to wash blinds sleaning clean blinds
  13. Admire your work.

Have fun cleaning them I found it is the best way to make the blinds look new.

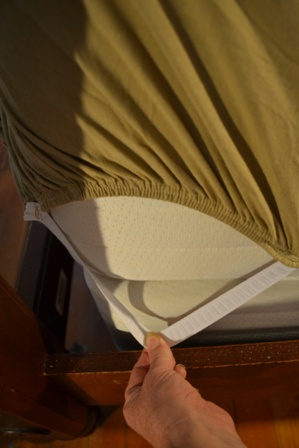
Check out my post on  How to Fix Fitted sheets to stay in place DIY

How to Fix Fitted sheets to stay in place DIY

Also check out My top 10 Favorite Things to buy at Aldi and Save

My top 10 Favorite Things to buy at Aldi and Save


Save

Save

Save

Pokemon Mew Costume

Pokemon Mew costume for Cosplay or halloween costume

Pokemon Mew Costume: This year my daughter has been really into Pokemon she likes the Mew character.  I made the costume for her this year,  I started with a generic dress pattern top and added the circle skirt.   The fabric was a anti polar fleece  perfect for trick or treating  she thought she was going to be cold but after running around from house to house she was sweating.  I don’t think she will be able to wear the dress for Comic Con during the month of May, great for the winter months.

Pokemon Mew costume for Cosplay or halloween costume

Pokemon Mew costume for Cosplay or halloween costume

I made the hat by copying a hat she had making the hat larger,  I added the eyes using turquoise polar fleece and white felt the beauty of polar fleece is that it does not fray so you can cut the shape for the mew eyes and don’t have to worry about applique edges just single needle the shapes.   I add the eyes did a dart on top of the hat to allow for the curve of the head.  The ears were added when I sew the front to the back.

Pokemon Mew costume for Cosplay or halloween costume


Tip make the outside of the hat longer then the inside lining  of the hat so when you line the hat .  I also use a lighter weight cotton knit jersey so the hat is not too hot to wear and the liner lays flat when worn.

The gloves had an eye on each glove and the dark pink paw mark on the palm.

Pokemon Mew costume for Cosplay or halloween costume

The tail was not stuffed the thickness of the polar fleece it was not needed.   The boot covers using tissue paper I careful traced my daughters boots pattern.   I sewn them and made a few adjustments to make sure they fit snugly.  Once they fit I serged them and clean finished the top

The entire project took about 2.5 yards of pink 56″ wide fabric-  I was good with the scraps.

Pokemon Mew costume for Cosplay or halloween costume

Pokemon Mew Costume

Pokemon Mew costume for Cosplay or halloween costume

Be sure to check out My Superhero Capes store :

Babypop Superhero cape store

Or if you want to learn more about my Adult Humor finger-less gloves store:

alien gloves avaiable at sickos on etsy

alien gloves from sicks on etsy

willow tree gloves on sickos on etsy


How to make a 3 headed dog

How to make a 3 headed dog Cerberus for a school project.  Step by step how to make a 3 d sculpture for a school project great for those Harry Potter book report projects or Latin class.

How to make a 3 headed dog Cerberus for a school project.  Step by step how to make a 3 d sculpture for a school project great for those Harry Potter book report projects or Latin class

My son had to a  7 grade Latin Project he decided to make a Greek mythological creature of a Cerberus.  He had a great time doing making the dog.  It lived in a display case for a few months.  The Latin Teacher requested the project back for the next year,  so he could show the kids, what a project can look like it.    This is also a great project for a book report on Harry Potter.

untitled-3

Materials needed

  • 1 Styrofoam based 12x12x1″
  • 1 package of 12- 1 1/2″ diameter Styrofoam  balls
  • 1 package of 4- 2 5/16″ x 1 1/2″ Styrofoam eggs
  • 1 package of 4- 2″ diameter Styrofoam balls
  • 1 Styrofoam Cone  3 1/2 x 8 7/8″
  • 1 package of wooden dowels
  • 1 3lb package of Sculptmold modeling compound
  • 1 can of black spray paint
  • Acrylic paint for mouth and teeth

Tools:

  • Knife for cutting Styrofoam-
  • sand paper
  • Putty knife of clay tools
  • bowl for mixing  sculptmold
  • water
  • paint brushes


  1. Cut 2- 1 1/2″ balls   for the bottom of the feet
  2. Using dowel to stabilize the legs insert 2 – 1 1/2″ balls like picture (stack off center)-  the top ball being 2″How to make a 3 headed dog Cerberus for a school project.  Step by step how to make a 3 d sculpture for a school project great for those Harry Potter book report projects or Latin class.
  3. Repeat  front legs with place the ball on straight
  4. Cone is the body the widest part is the shoulders (make the total length 6″ cutting off the narrow side)
  5. Insert the legs in the cone
  6. Using the dowels and the eggs Styrofoam  and make the headsHow to make a 3 headed dog  Cerberus for a school project.  Step by step how to make a 3 d sculpture for a school project great for those Harry Potter book report projects or Latin class.
  7. Following the directions of the Sculptmold modeling compound mix up and put layer after layer building up the bodyHow to make a 3 headed dog Cerberus for a school project.  Step by step how to make a 3 d sculpture for a school project great for those Harry Potter book report projects or Latin class.
  8. Allow the layers to dry (this is not a night before project)
  9. Add the Ears last How to make a 3 headed dog Cerberus for a school project.  Step by step how to make a 3 d sculpture for a school project great for those Harry Potter book report projects or Latin class.
  10. Once the project is dry you can sand down the Cerberus down prior to painting (this step my son did not want to do but you can do it)
  11. In a well vented area preferably outside spray paint  the entire project (if it is too cold or too hat spray paint will have problems so be sure to read instructions)
  12. Paint on collar, eyes, and mouth. How to make a 3 headed dog Cerberus for a school project.  Step by step how to make a 3 d sculpture for a school project great for those Harry Potter book report projects or Latin class.

Good Luck I hope you get an A+

How to make a 3 headed dog Cerberus for a school project.  Step by step how to make a 3 d sculpture for a school project great for those Harry Potter book report projects or Latin class.

Linking up to Motivation Monday

Quick Compost and Container Garden for Earth Day

reused coffee can for plants

Quick Compost Container Gardening:   Today is Earth Day a great day to get outdoors and celebrate the glory of earth.  I decided to plant some seeds so I can have  a bountiful summer.  With my dogs a low garden is not my first choice because everything get trampled.  This year I am returning to my Raised beds.  Which have strawberries and lettuce in them since the like shallow soil.  Plus I am planting Roma tomatoes in containers and squash in my front yard.

The tomatoes I am starting from seed. I wanted to reuse and recycle some containers.

  • I  did a quick blend of organic material to add to my soil  I bended apple core, egg shells, banana peel, coffee grounds, and coffee for the liquid- in my Nutria bullet.  Then added the mixture to my soil.

quick compost


  • It looks like this after blending.. like a disgusting dirt organic smoothie

container_gardening_1_013_0011-4

  • I am recycling an old coffee can.   I painted it a bright color, using a screw driver and hammer  knock some drainage holes.

reused coffee can for plants

  • Painted the can  leaving the lid on top not wanting the paint to touch the soil


reused coffee can for plants

  • Filled it with a reused broke butter dish for allow the excess water to drain.

reused coffee can for plants

  • Planted the seeds.
  • I then I put the remaining seeds into a egg carton to start the germination process to be transfer to containers later.

reused coffee can for plants

Here are some great ideas to use as planting container:

  • old food containers
  • old rubber boots
  • tires
  • old suitcases
  • old pallets
  • old globes from light fixtures
  • wash basins
  • milk jugs

quick compost

Be sure to check out my post on a Raised Pallet Garden

Raised Garden

How to make a iphone neck holder

ipod neck holder

How to make a iphone neck holder : So I like to work hand free while listen or talking on my cell phone.  So a few years back I made a phone case neck holder that allows me to talk or listen to my cell phone hands free.   Decided to share the pattern and how to make one with you.

How to make a Ipod neck holder

  • Strap 2″x30″ fabric A cut 1
  • Body 5″x10″ Fabric A  cut 1 and Fabric B cut 2
  • Closure 2″x 5″ Fabric B cut 1
  • 1 ” Velcro

Print out of cut parts at bottom of post

  1. Cut piecesiphone neck holder
  2. Take closure strap, fold long ways and sew as showniphone neck holder iphone neck holder
  3. Turn and press
  4. Take strap, fold, sew and turn if you attach a ribbon to one end , sew inside tube and pull makes turning a small strap much easier, cut ribbon off once the strapped was turned. iphone neck holderiphone neck holder
  5. Press strap, set to side
  6. Take body placing wrong side together, place in closure strap at short end sandwiched between the layers.iphone neck holder
  7. Sew around the edged leaving and opening to turn the bodyipod_neck_holder_1_013_0011-11
  8. Clip corners, turn body and press
  9. Add Velcro on strap and body so they match upiphone neck holder
  10. Fold and place neck strap at an angle between the body layers and sewiphone neck holder

The Neck holder is great for hands free talking on the phone ass Headphones and do dishes while you listen to your music.

ipod_neck_holder_1_013_0011-3-3ipod neck holderipod neck holder

ipod holder

Enjoy


Easy Crochet Edge Dollar Store Gloves

crochet glovesEasy Crochet Edge Dollar Store Gloves I love when you find something inexpensive and turn it in to a gem.  I started working on these $1 gloves a few years ago when the owner of TheTwinery sent me a sample and said you will create something.   I finally deiced I should share the quick easy gift that is an do anywhere craft for under $8.  Crochet Edge Dollar store gloves.   Mow I am not a crocheter all I know how to do is edge stuff,  I have tried to learn to crochet and the little old lady said i will never get crochet because I am a knitter. So the extend of my knowledge is a basic crochet chain stitch. Which is what there simple gloves are.

What do you need to make Crochet Edge Gloves:

  • Dollar store stretch gloves
  • Buttons or embellishments
  • 2 colors of twine 15 yards each  TheTwinery.com
  • Size E 4-3.5mm crochet hook
  • Sissors
  • Darning/yarn needle for weaving in loose ends

crochet_gloves_013_001-4

  1. Insert needle in to front of glove. crochet
  2. Wrap the yarn and pull it back through glove,
  3. crochet Leaving the yarn on needle go through the glove again.crochet
  4. Wrap the yarn again an pull through print your new loop thorough the one that is on the needle
  5. crochet 
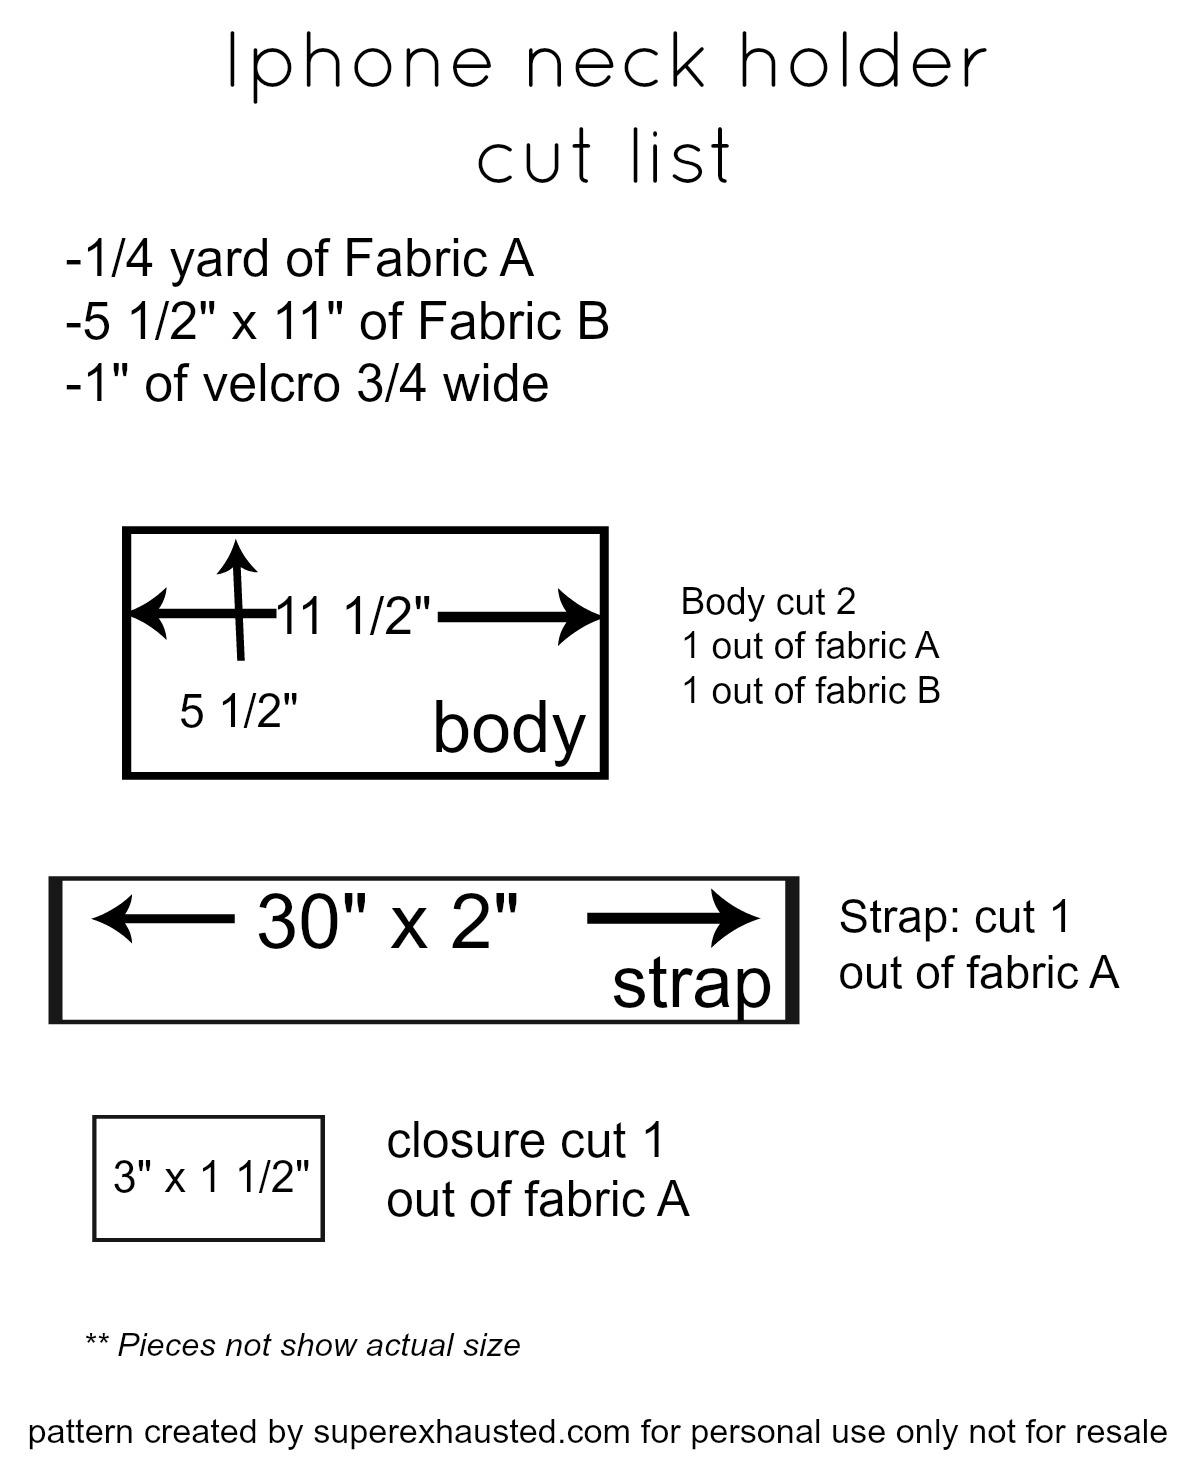
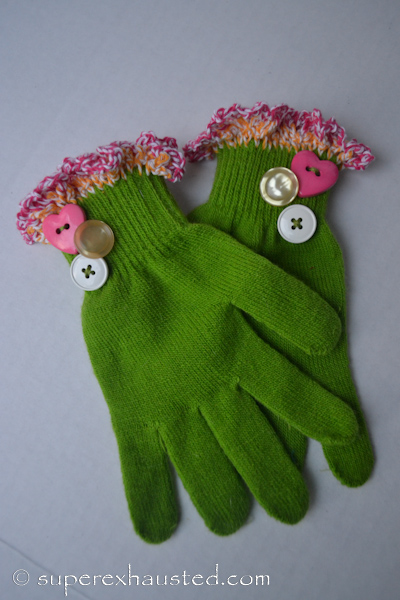
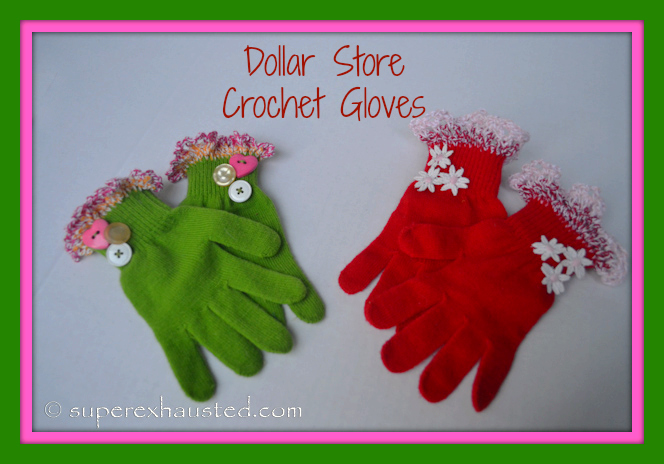
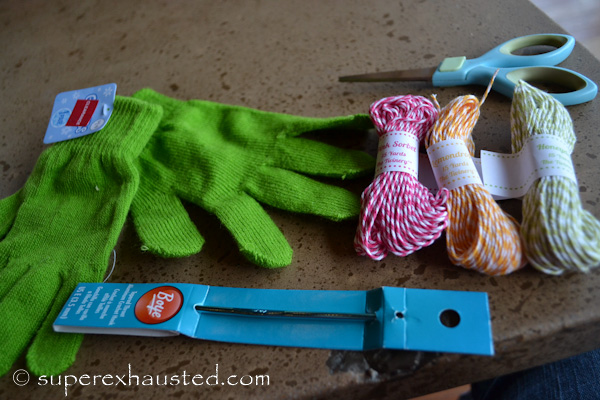
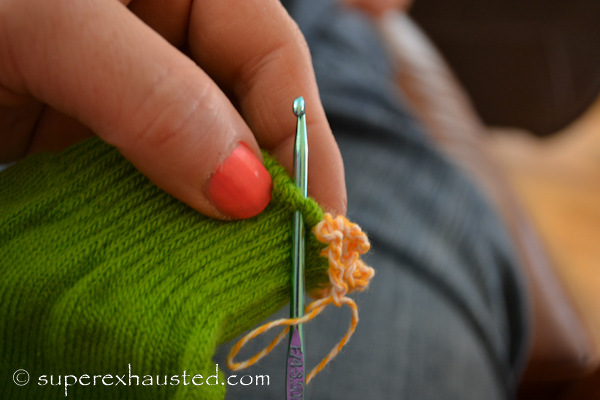
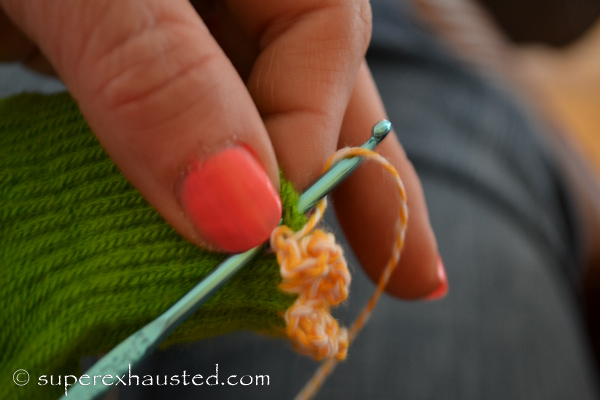
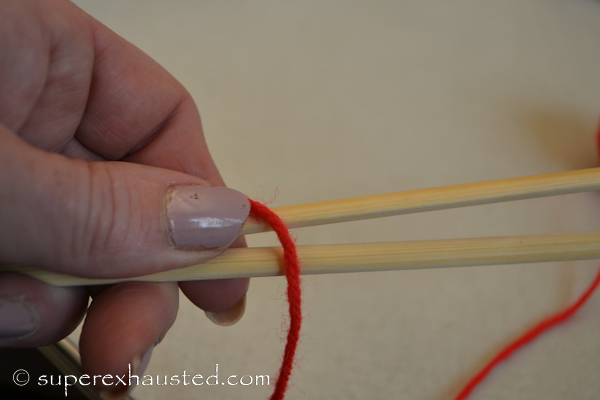
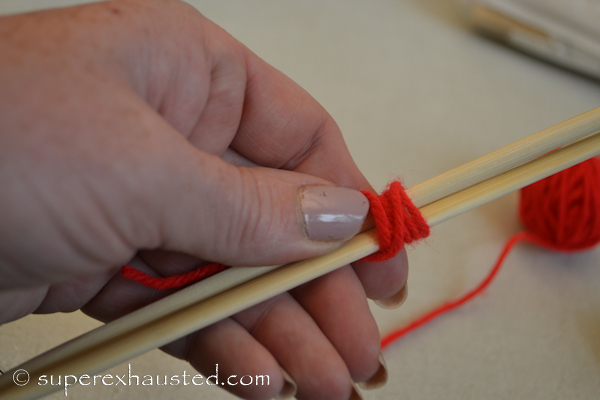
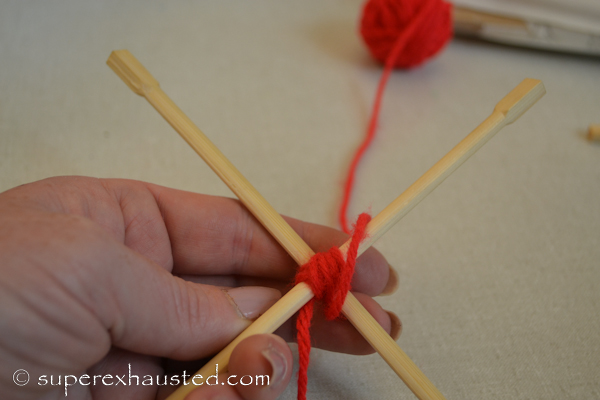
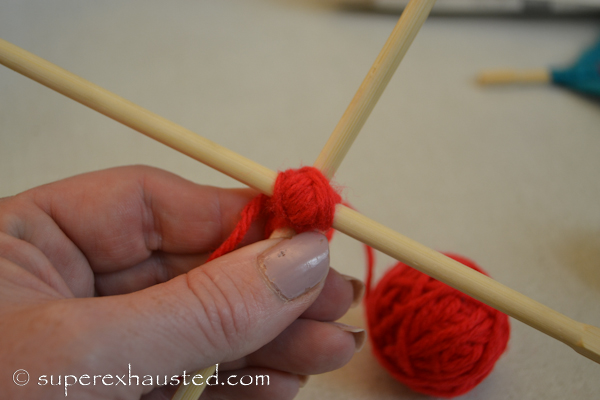
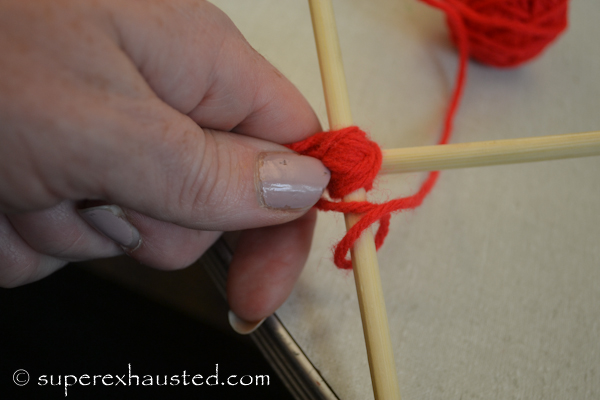
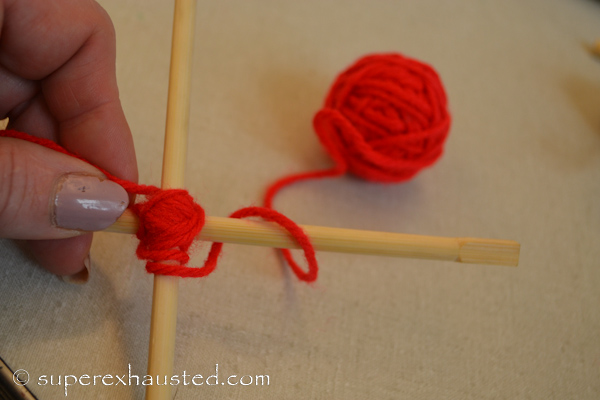
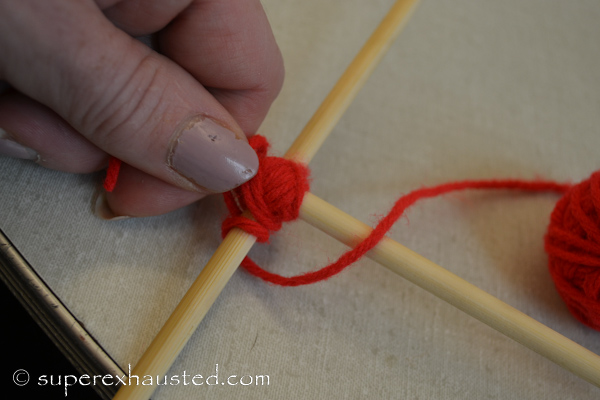
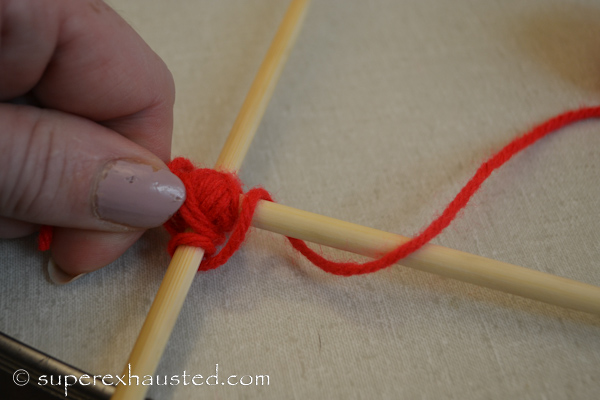
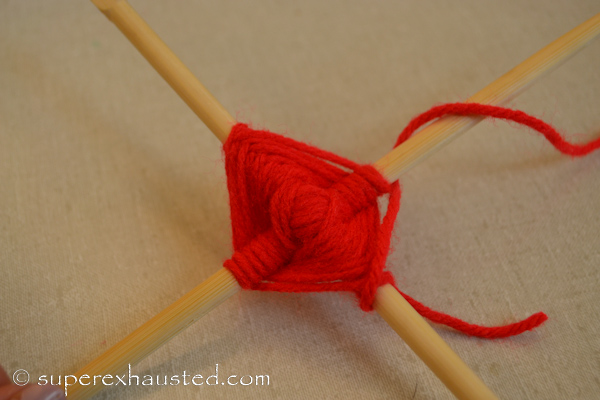
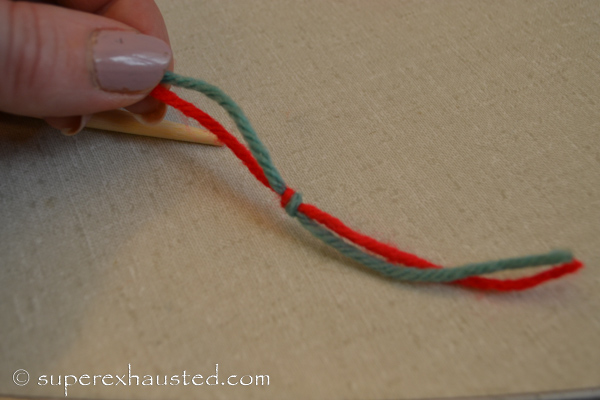
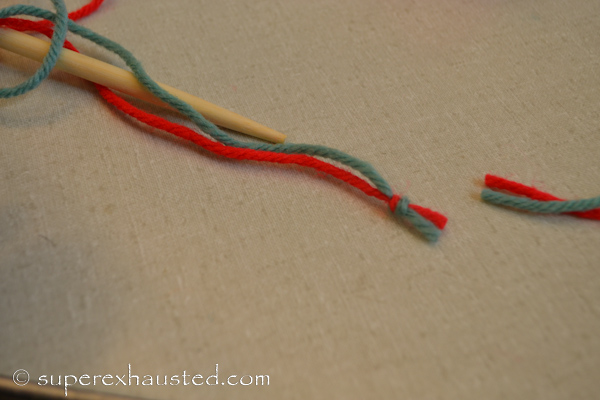
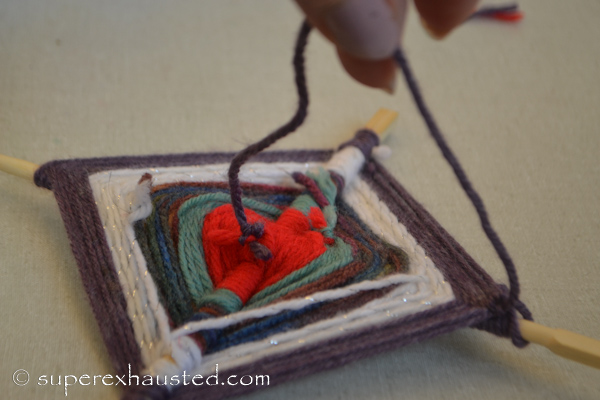
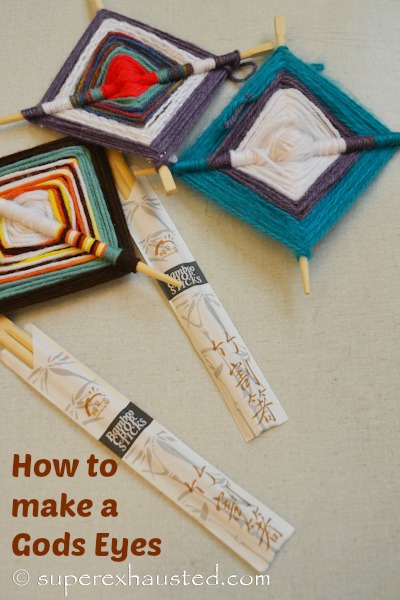
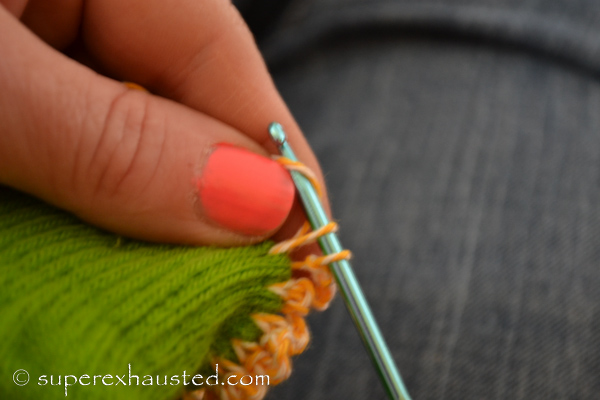
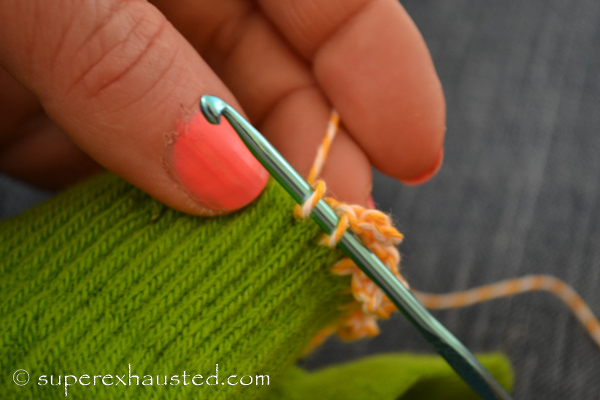
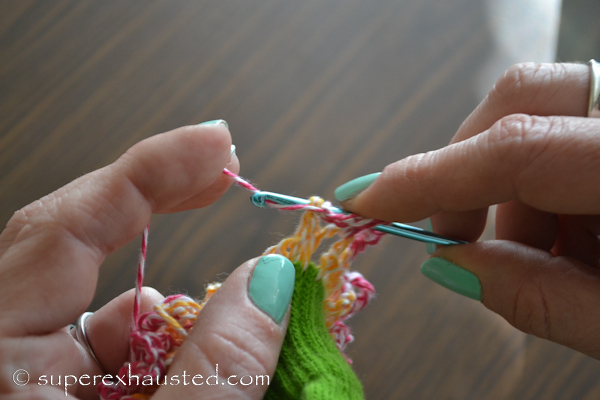
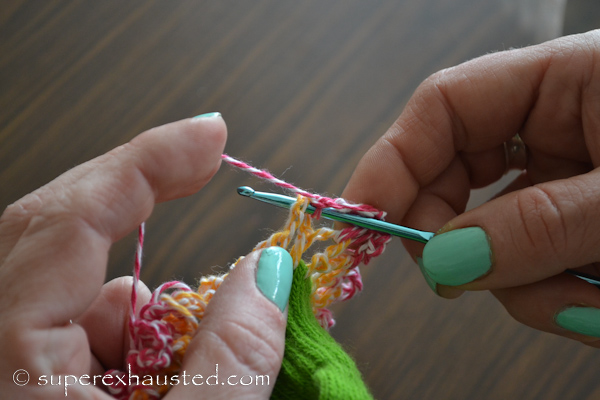
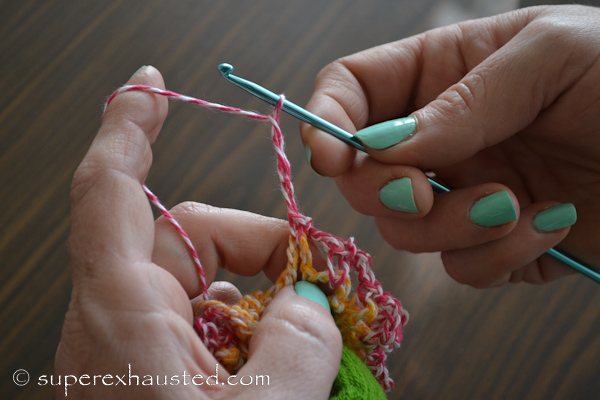
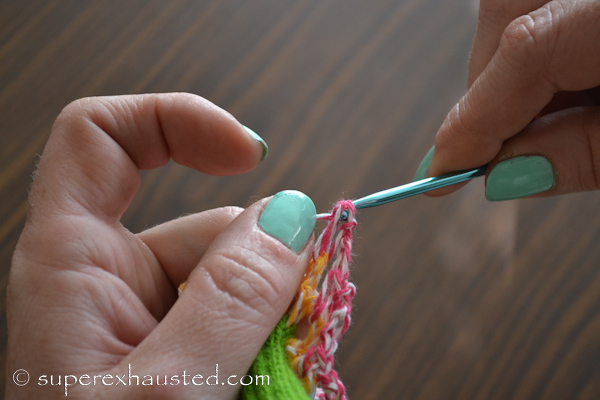
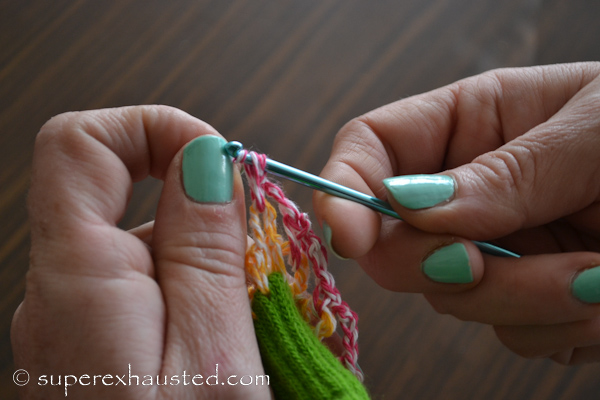
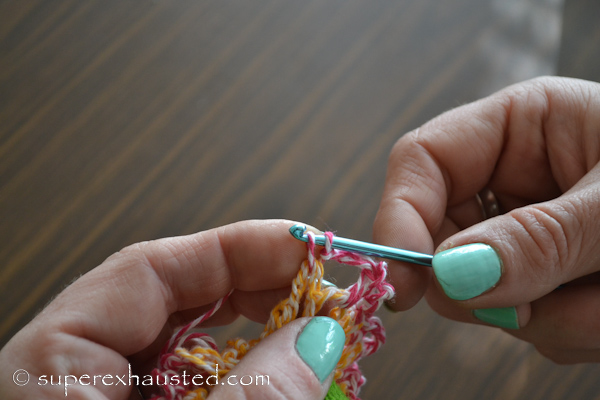
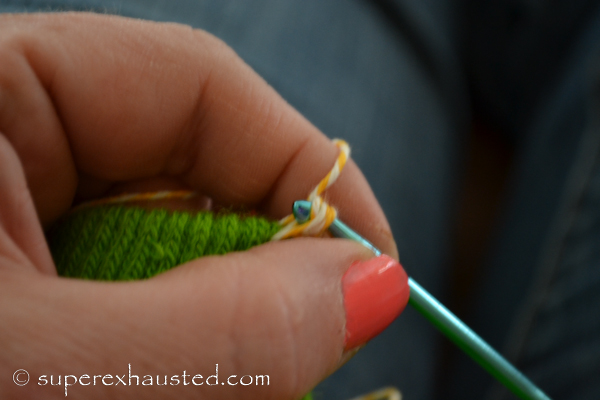
Then loop the yarn around the hook and back through the loop that is on the hook repeat 3 times (this is a single needle chain or single crochet
  6. Then after the 4th chain stitch – put the hook back through the cuff of the glovecrochet
  7. bring the loop through again and repeat 3-4 chainscrochet
  8. Go around the entire cuff to where you started.  If you have the yarn and want go around again.  Each of the Twine yarn when around 2 cuff twice (like the red pair of gloves)crochet
  9. Just tie off the 1st color (pulling the cut twine through the loop) and start the 2nd color repeating the steps,  I attached at once loop of chain stitch.
  10. crochet Repeat the chain stitch process on the 2nd color
  11. crochet crochet crochet crochet crochet When you go around the entire cuff with second color tie off.
  12. The weave the tails (ends)  of the yarn through crochet so it – Here is a you tube video link How to weave Tails on Crochet
  13. Finish both gloves and embellish with Button, jewels or embroider edging.

crochet dollar store


I love the Idea of these dollar gloves for Holidays:

  • Christmas Red and green for Christmas with little trees,
  • Chanukah Blue and white with star of David on them .
  • Valentines with hearts
  • Halloween with ghosts and glow in the dark deco
  • Thanksgiving
  • St. Patrick’s Day for a little girl to wear as she walks in a parade
  • crochet gloves

Pumpkin Carving

Jackolantern Pumpkin Carving Party- Every year I host a carving party this year for my Moms Group at Church they year was the 8th year. Prize Pumpkins .Pumpkin Carving PartyThis year I did the Boba Fett from Star Wars and I used a really Pumpkin.   Originally I was going to do R2D2 but they pumpkin I had has a rotten bottom.  So I have to choose another larger pumpkin.  This year was great year for pumpkin they were all large and thick with the flesh,  so I wanted to choose one that was not to hard to cut.   In the past I have done  Styrofoam pumpkins because the designs were fun to see year after year (cats , Dragons, traditional Halloween).   Starwars yea one year is good.

Happy Halloween.

Label Maker Review : Epson Label Maker lw-600

review post disclosureepson_label_maker_013_001-4


Label Maker Review : Epson Label Maker lw-600 review Recently I was ask the Review the Epson LW-600 Label maker.  What is so great about this printer is a it can use either your computer or an app on your phone to create the label.  So labels on the go.    Quickly and easy with no wires all through blue tooth.   My daughter created her own.

For me the Epson was a winner In the past I was always looking for cord or adapters.  The Epson LW-600 was so easy I find in not as cumbersome as older style label makers so I use it more.

We used  label everything for my daughter for school outside,  My daughter did her own .  The App has a huge variety of different fonts and logos and very easy for a ( year old to use.   You just open the box add batteries or the cord for power, down load the add and ad the label cartridge as instructed and you are off and printing labels.

epson_label_maker_013_001-5

The LabelWorks® LW-600P is the first app-enabled label printer on the market, offering unmatched capabilities in the world of label creation.  The Epson LW-600P and iLabel app takes full advantage of the capabilities of smart phones and tablets to offer features never before available with traditional label makers, such as:

Epson LabelWorks LW-600P

  • “True-view” label preview capability using the camera function to ensure labels perfectly match what’s on the screen
  • Wirelessly create, edit and print labels
  • Handwriting mode for custom drawing or annotation of labels using the touch screen interface
  • Speech-to-text voice transcription and printing
  • In-app storage of created label for future use
  • Import of custom graphics such as symbols, logos and photographs to copy & paste onto labels for a more professional look or to add a personalized touch
  • Creation of QR code labels for content sharing or barcode labels for inventory management which can be scanned by third-party QR/barcode apps

Epson has also launched a developers’ program for the World’s first App enabled label printer. Developers can access the LW-600P SDK and open APIs and very easily create personalized printing solutions with the LabelWorks LW-600P. For the LW-600P developer program please visit http://bit.ly/1tVG4gM

Epson LabelWorks LW-600P

Epson’s iron-on labels are compatible with two Epson Labelworks products:

  • Iron-on Kit– includes the LW-300, a portable battery-powered handheld label printer, and two iron-on tape cartridges in a convenient carrying case
  • LW-600P– app-enabled label printer allowing wireless printing for iOS and Android devices

With fall here  I am looking forward to using the Iron labels for the Jackets, gloves,  and Hats that will be getting lost.

They also have ribbon tape- to make your holiday packing look great!! -Think cookies!!

The cost of  Epson Label Maker lw-600  $99  the labels.

The Epson Labelworks tape range from 14.99 up depending where you purchase it.  Hint check Amazon or Epson.

Back to School Service Project #Bagitforward

sponsored postDo a Back to School Service Project with your kids #Bagitforward.  This is a great time of year to get your Kids involved in a service school project.  We did a the BagItForward project for Elmer’s Let’s Bond and Champion for Kids.  We got the neighborhood and our local swim team to help donate.

kids doing a back to school service project

We were asked to help Champion for kids and share with my readers a great Back to school service Project The Champion for kids #BagITForward.  So 1st we decided  where we were going to donate West Kensington Ministries in Norristown Square.champion for kids logo

I wrote a letter to all the swim team parents telling them about the service project my daughter and I were working on.   The parents team donated and neighborhood help donate the school supplies which included the following.  Here is my Back_to_school_service_project Sample Letter to parents.

Ideas for supplies:

  • Folders
  • Pencils
  • Scissors
  • Rulers
  • Composition books
  • Crayons
  • Back Packs
  • Markers
  • Color pencils
  • Glue sticks


kids doing a back to school service project
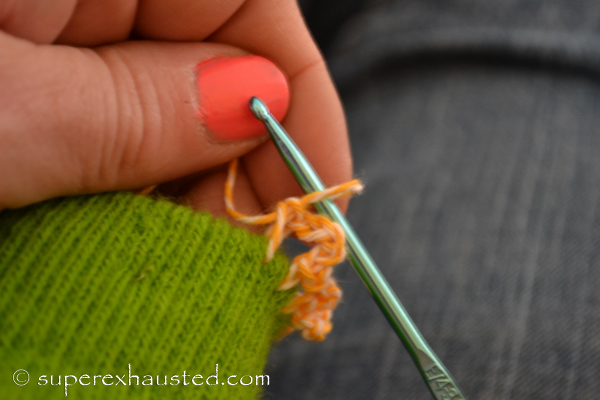
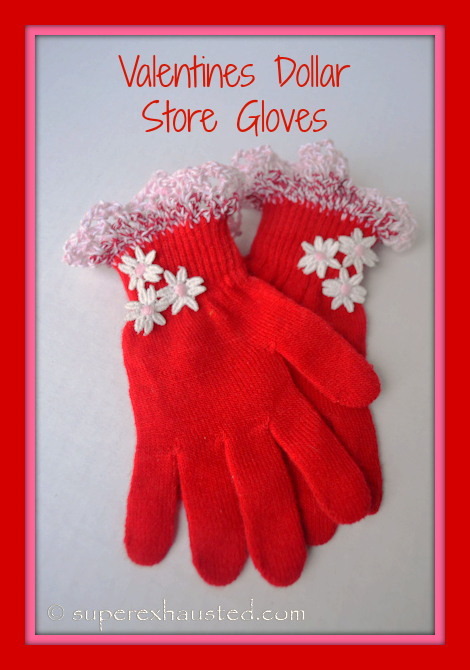
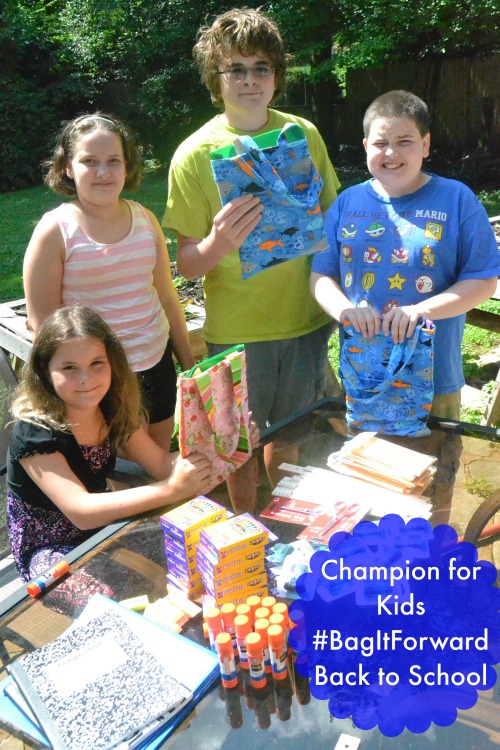
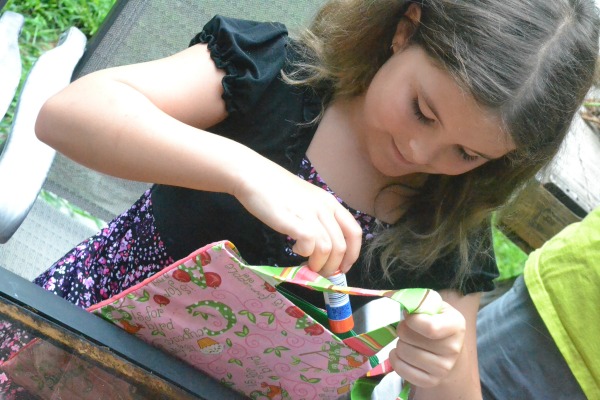
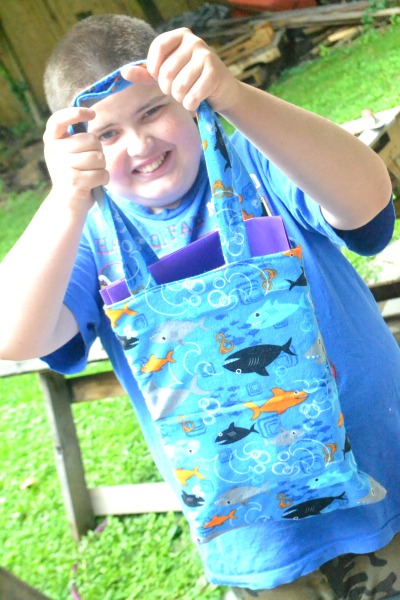
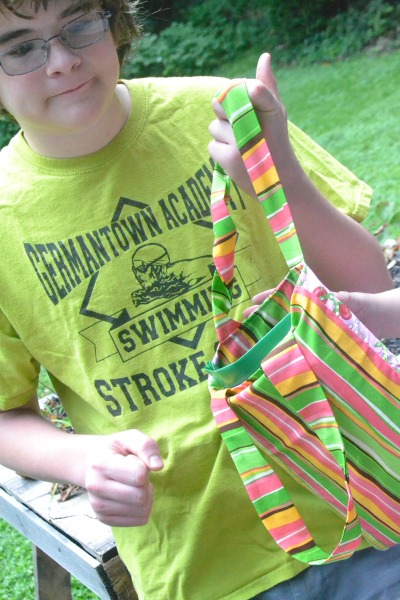
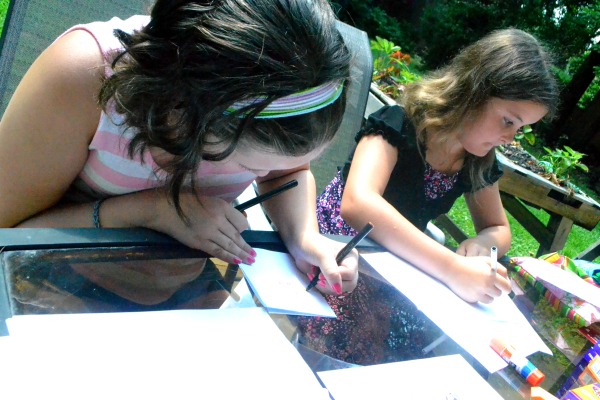
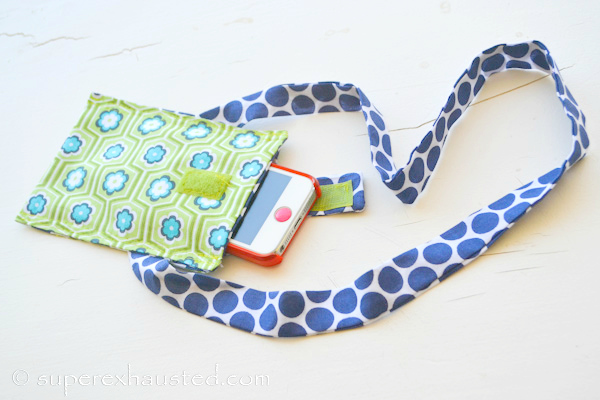
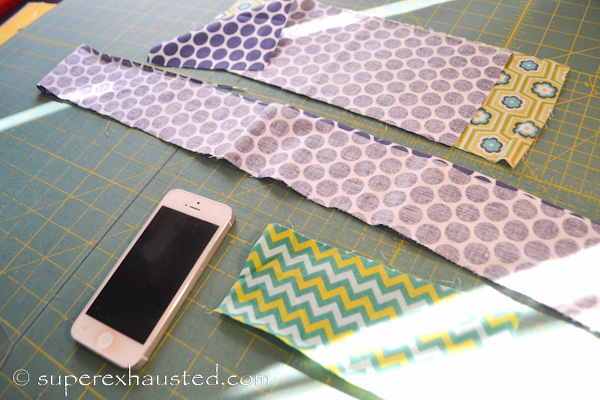
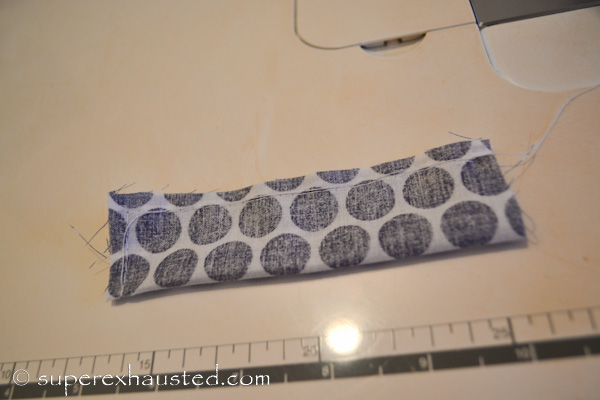
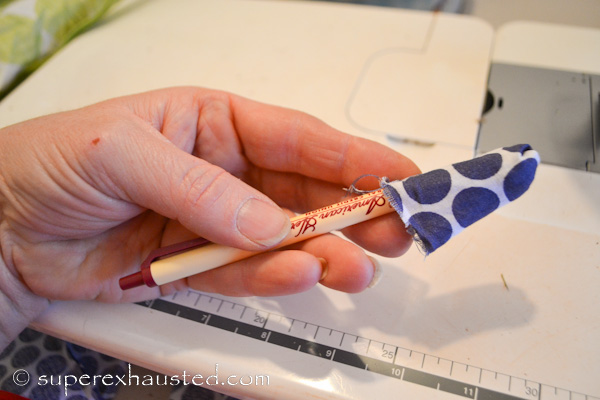
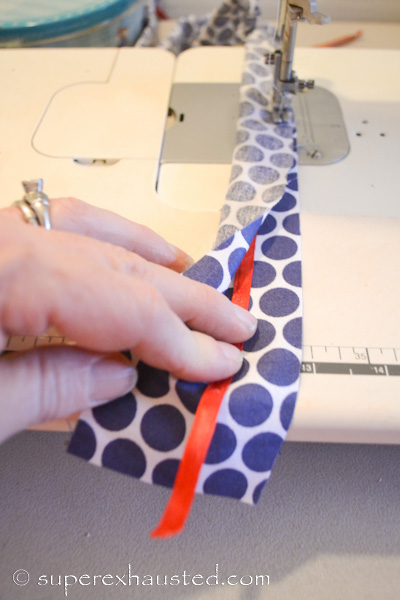
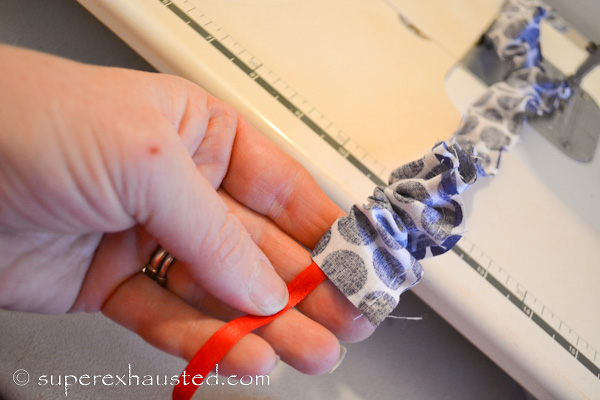
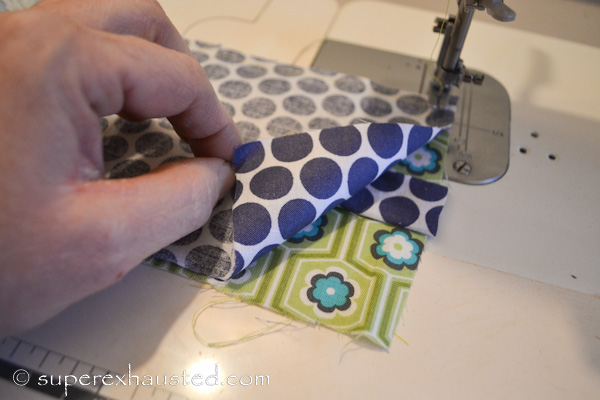
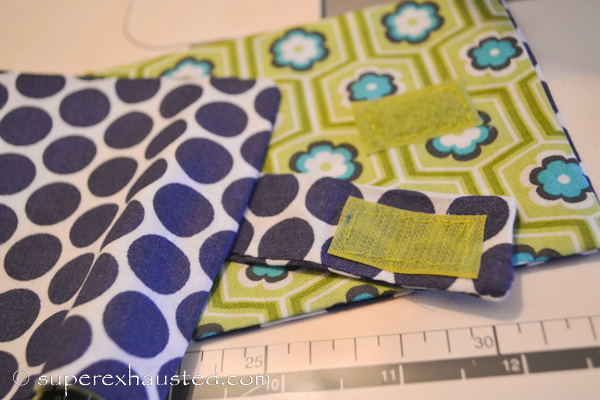
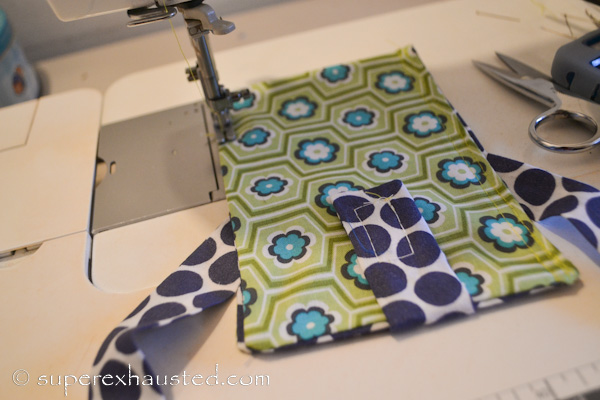
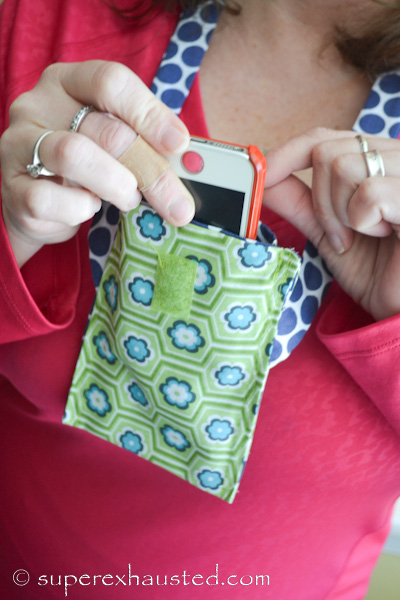
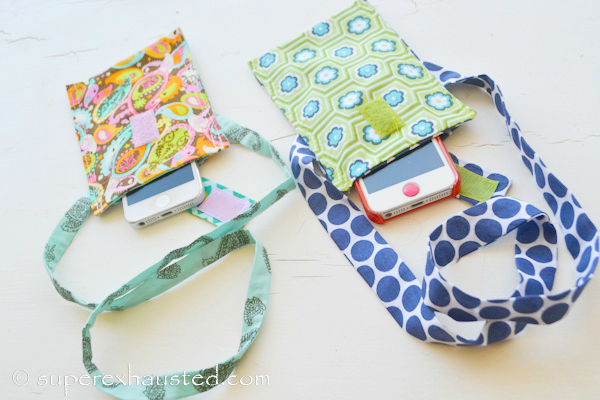
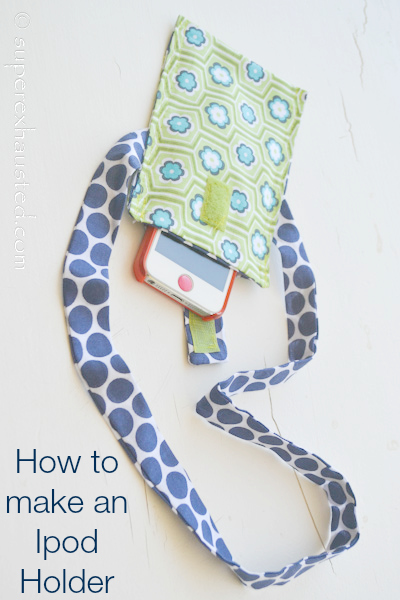
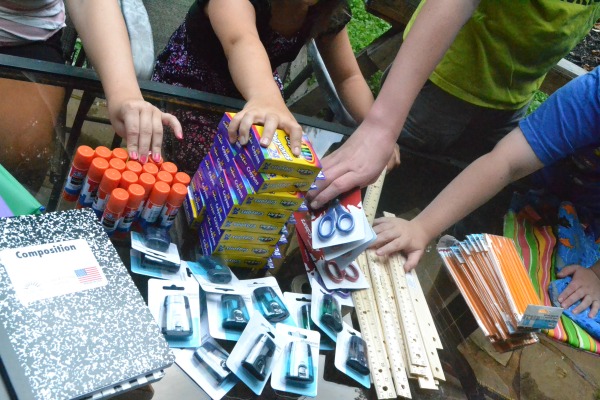
My daughter and I made bags for the kids using fabric from my vast collection of fabric. If you dont sew!  you can buy bags or if your donations can afford it Back Packs are wonderful.   (Check out my post later this week on how to make the bag great 1st sewing project!

bagitforward_1806We got the Kids together including my teenage son and assembled the bags.

Bagitforward_1803working back to school service project

Then the kids sat  down and made a card for each kid receiving the bag.  Welcoming them back to school.   Lots of bright colors, flowers, trees, apples, and anything that make kids smile.

Some Ideas for the cards:

  • Welcome back to school
  • Have a great Year
  • You are a school Superstar!
  • Have fun Learning!

kids coloring cards

The kids loved this project because it was fun for them and they understood the need for the supplies for the kids.  So when you are out shopping for your kids this back to school pick up a few items and donate them to . Your local school, preschool, church, teacher.. because there is always a child who wants to smile with new supplies the 1st day of school!

elemers lets bond pictureSHARE your story with championsforkids.org/share so that they can celebrate your participation and inspire others with creative ways to bond with children and provide the supplies they need to thrive!  Please let Champion for kids know that you are ONE of Millions who helped us reach our goal of helping 20 million children by 2020!


How to make a Gods Eye

gods eyesHow to make a Gods Eye: So my church summer did a art camp where they work on a play and do a complete performance in a week.  It is a great to see.  Think summer stock for church.   I was in charge of teaching a art segment and since the play was from the 1970’s I decided to make a craft that I did when I was a Kid Gods Eyes.

When I taught the class the kids ranged from 4- 12 years.  The kids 4-7 needed a little help.  The older kids need help to knot off but after being shown they complete the Gods eye on there own.

When I was a kid I used sticks I would find in the yard,  since I had 30 kids for my class- I went to the Asia market and purchased chop sticks:

How to a make Gods Eyesgods eye

Supplies:

  • Yarn ends various colors
  • Chop Sticks

gods eye

  1. Make the yarn in to small yarn balls so easy to manageyarn
  2. Then take the chop sticks and start wrapping the yarn, with the sticks parallelchop sticks chop stitck knots
  3. Then split the chop sticks into an X and wrap the yarn to stabilize the Xchop sticks with yarn
  4. Then reverse the yarn  and wrap the yarnchop sticks with yarn
  5. Then start move the yarn around the chop sticks – wrap yarn around the chopstickchop sticks with yarn gods_eye_013_001-25
  6. Under and around one then to the next chop stickchop sticks with yarn
  7. Then over the top and around the next  gods_eye_013_001-27
  8. Repeat under and wrap around and over and wrap, moving from one chop stick to the next.chop sticks with yarn
  9. Then switch colors tieing a knot tie a knot tie a knot tie a knot tie a knot tie a knot yarn and chop sticks
  10. Wrap to the switching the colorsgods eye
  11. Then once you are done knot off the yarn gods eyegods eye
  12. Create a loop to hang with by knotting to the center. gods eye gods_eye_013_001-41

This is a fun craft the kids will love.  Every kid in my class asked to make more and xtra supplies to make at home.gods eyes

Be sure to enter my Calgon giveaway  on my Plus Size blog BigGirlsGuide