Category Archives: Crafting

Crafting and DIY blog post showing step by step sewing, crafting, and creative ideas for home and family

10 Easy American Girl Crafts

doll with a blanketMy daughter loves to make Easy American Girl crafts.  We have come up with some of our own crafts but also have located some great crafts to make with your kids.   I have used some of these crafts at my daughters American Girl party and also for her to make on her own.

One of the simplest craft is to make a blanket  Use Fleece Fabric 13″x13″ and fringe the ends with scissors like this:

Also make a Poncho for your doll using Polar Fleece:

Make a Tea or Coffee cup via Doll Craft

American Girl Picture Frame by Superexhausted (ME)

American Girl Music stand from Doll Craft

American Girl School Folders from karenmomofthreescraft.blogspot.com

Make a AG Lemon stand from AGdollplay.blogspot.com

American Girl Uneven bars for Gymnastics from myagdollcraft.blogspot.com

American Girl Hula Hoop Gymnastics Crafts  from the RealCoake.com

Mini Snow Cones creaturecomfortsblog.com

Hands down Doll Craft is the best site to find amazing crafts for your American girl  from AG Watches , accessories , and more

Also there are great video on your tube like this one from MyFroggyStuff she used recycled clothes to make the American Girl Sofa

There is an amazing.

I will also recommend getting some baking clay for your little girl and let her make food for her doll.

doll and a blanket

Think Spring Sale – Save up to 50% Off on Outdoor Fabrics and up to 40% Off on Seersucker and much more at HancockFabrics.com. This sale is valid through May 21st.

Check out my other American Girl Sewing post for Free American Girl Patterns

Or

How to Throw and American Girl Birthday Party

Follow my 18″ Doll Board on Pinterest for more Ideas for your American Girl.

Have a great day and create something.
This post contains affiliate links:

Little Passports

American Girl Birthday Party Ideas

american girl doll party 
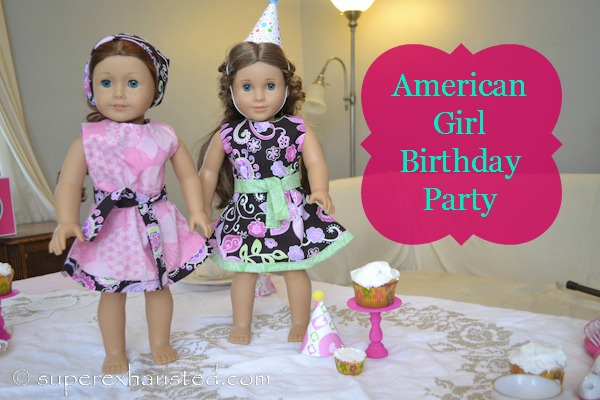
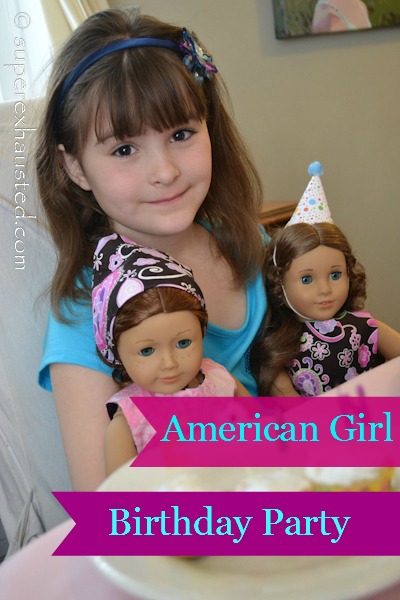
American Girl Party Ideas:  For my daughters 8th birthday I threw her an American Girl Birthday Party.  Here are some of the ideas we used for the perfect tea party . First off we did not call it an “American Girl Party”  because not every girl had an American Girl doll.   So we called it an Doll party .. bring your own doll.  I had extra dolls the girls could borrow for the day.

American Girl Birthday Party Ideas :Prep

I made a few thing and then had some crafts for the girls to do:

I went to the thrift store and purchased a tea set, along with tea pots, and lacy table linens.  Super inexpensive  ($12 for linens and tea set) and add the real feel to the party cost as much as buying paper stuff and it became a tea set for my daughter.   I also purchase real flowers for the center of the table. tea table  set up

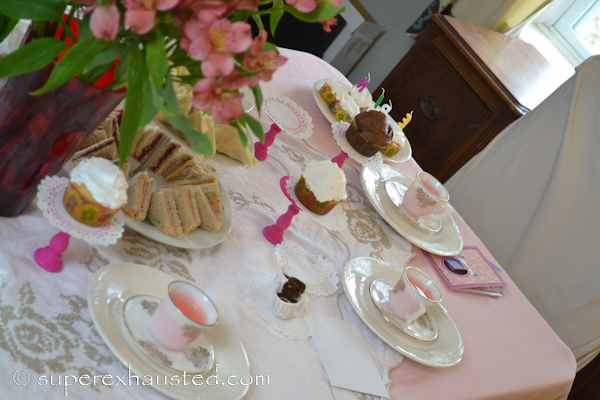
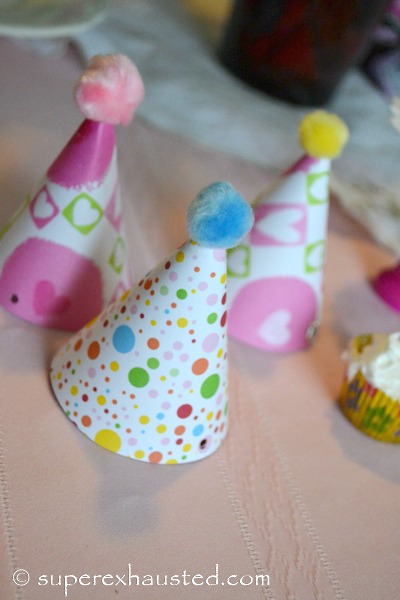
I made American Girl Party Hats the pattern is found here at Make it do.com it is a scrapbook paper pompoms and glue,  one sheet makes about 4 hats

party hats for AG dolls

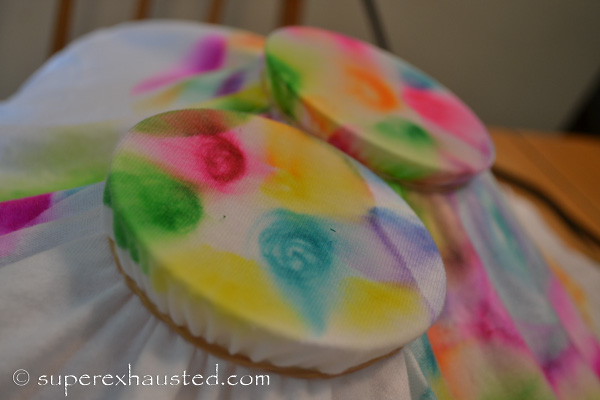
Cupcakes Stands  I followed www.tammymitchellphotography.com to make the mini cupcake stands,  the parts were purchased at AC Moore look for the package of disks much cheaper than buying loose  12 cost me under $10:Mini cupcake stand

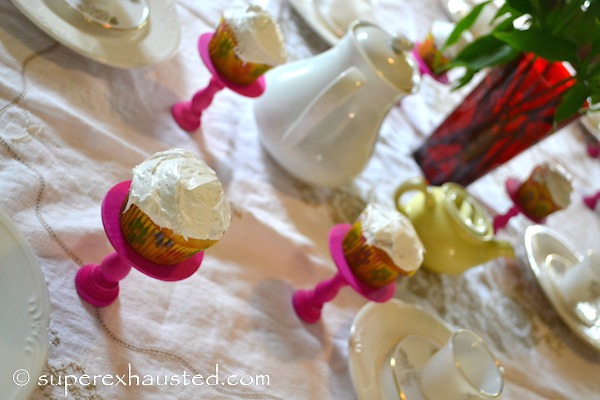
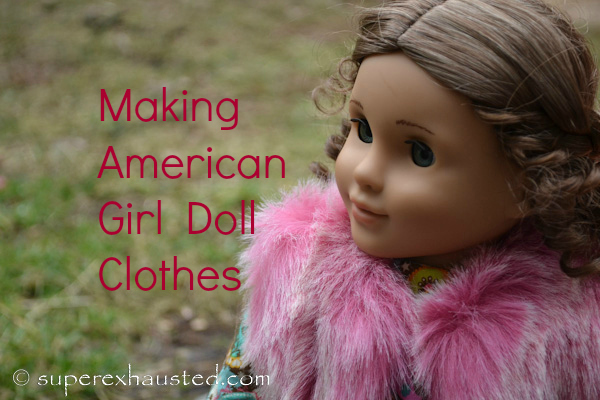
I also made every doll a dress to wear for the party it was also a American Girl favor.   I won lie my fingers did hurt after making such small clothes.  I made the pattern myself post coming soon or refer to my free patterns for American Girl Dolls.

Tip: I found an old vintage suitcase to display the dresses.  When the girls arrived  they could pick a dress for the doll to wear at the party.

american girl doll dresses

Food Ideas for American Girl Doll Party:

  • Tea sandwiches:  Peanut butter and Jelly, ham and cheese,  cucumbers and cream cheese-  I own the tiered stands if you don’t and what to make them Joy Hope  crafts has a great tutorial on how to make a  colorful tiered cake stand.tea sandwiches
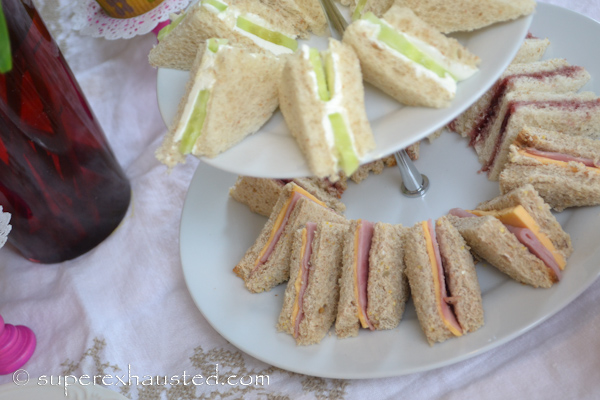
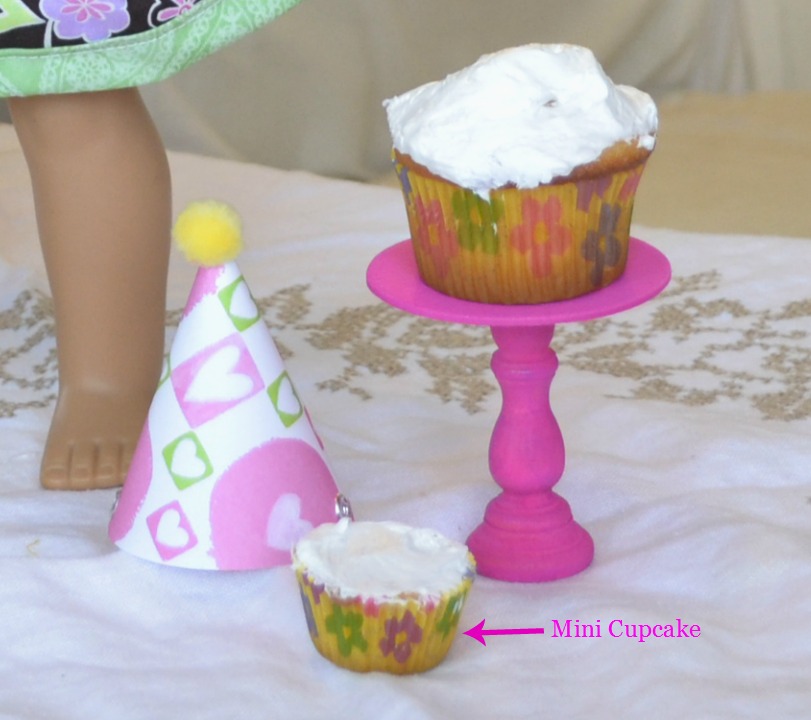
  • Cup Cakes and mini cup cakes –  I bought cup cake wrappers and the mini wraps normally used for candy for the mini doll cupcakes.  Wilton makes these and they are superCupcakes and a hat
  • For tea we used pink lemon aid- in the thrift store pots

American Girl Party Crafts:

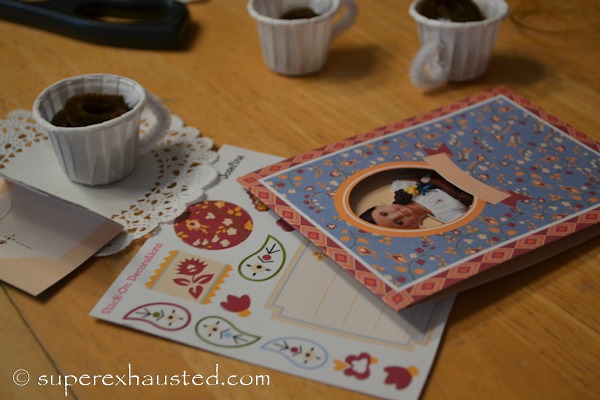
We had the girls make a few simple crafts like coffee cups from doll diaries… I went to burger king and got the ketchup holder  for your condiments cups.  Pipe cleaners are about .69 each. The small dollies I found at the craft store. coffee cup

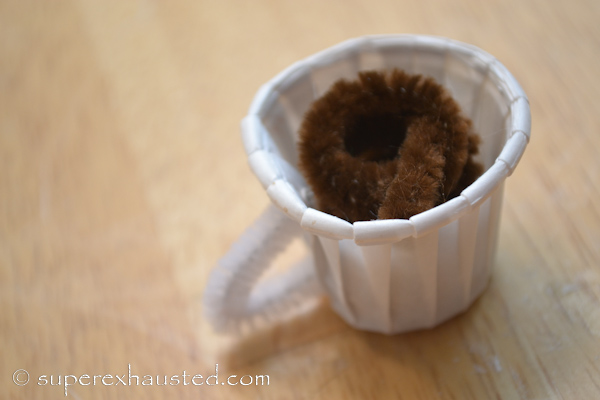
We also go the girl a American Girls Cards Historical Craft Pack so they can make cards.  I found these at Micheals,  Ac Moore or here on Amazon.  The cards are a 21 pack of cards for about $12 on amazon so enough for the girls to make 1-2 cards each depending on size of party. party craftsamerican girl cards
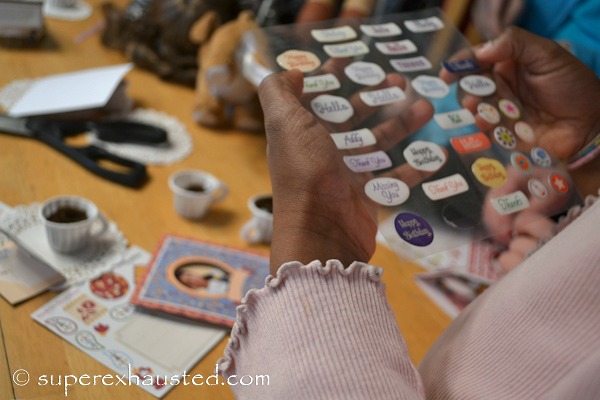
Also another great Craft idea is the American Girl Doll Picture Frame  with a little mod podge, American girl catalog, and in expensive wooden frame.   Take a picture of the girl with her doll at the party and send it in the thank you note. american_girl_frame_001 (102 of 3)

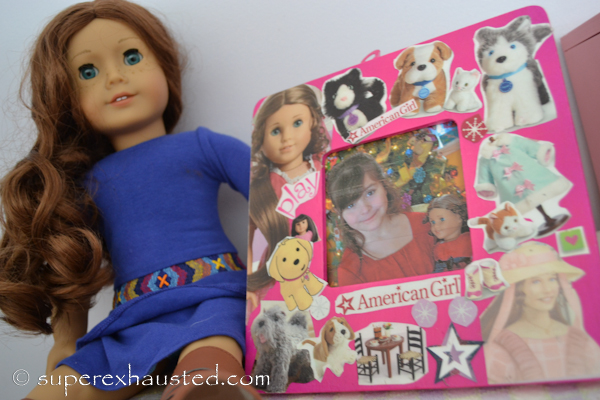
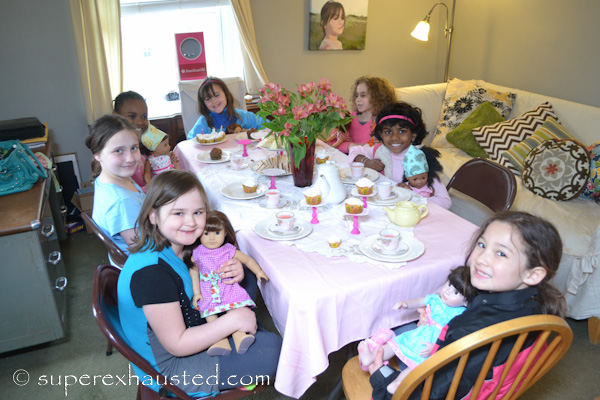
  • It was a super fun day for all the girls.  American Girl Party was a hit.   We start out making some crafts,  because the dolls need a cup to drink. Them girls were super quiet once they started the tea party polite pass in the “tea ” to each other.  Very Adult.  Then they went and played with their dolls in a large group. girls at a tableamerican_girl_party_001b(160 of 81)

Be sure to check out my other posts:
Easy American Girl Doll CraftsMaking American Girl  Doll ClothesAmerican Girl Picture Frame  for under $3.  Great party craft

Harry Potter Theme Birthday Party Back drop with PDF

Tips on getting childrens ears piercing


This post may contain Affiliate links
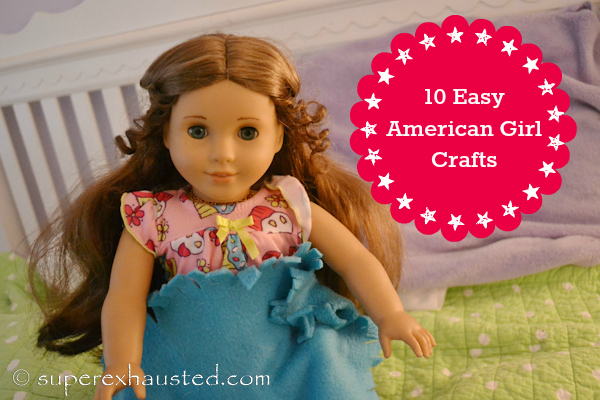
Little Passports

How to make Sharpie Tie Dye: zacchaeus crafts

Crafts: Sharpie Tie Dye is a great craft to do with kids it is a low mess way of doing a tied dye.  You make the tie dyed patterns  using sharpies and alcohol.   We made these shirts while teaching  the  bible story of Zacchaeus.  The children ages ranged from 4-17 made the Sharpie tie dye zacchaeus crafts.  This simple easy tie dye was a huge hit with the kids.  The tree takes about an hour some kids took less time.sharpie tie dyed


Sharpie tie dye  :  zacchaeus crafts

This craft was adapted from ArtGirlJackie sharpies and rubber bands

Tools :

  • Sharpies 16 pack  with bright colors and florescent (removed the dark colors Browns, blacks, drk purples, navys)
  • Tee Shirt white
  • Large Plastic Cups(solo cups)
  • Rubber Bands
  • 91% Alcohol (the 70% does not bleed correctly- I found at Rite Aid)
  • Small cup
  • Eye Dropper
  • Blow Dryer
  • cardboard to fit inside the shirt
  1. Choose a well ventilated area or near an open window
  2. cut the cardboard inside the shirt to protect the back side of the shirt
  3. Place the solo cup under the upper part of the shirt  open end of the cup up
  4. Place the rubber band over the shirt around the mouth of the cupSharpie Tie dye
  5. Using the sharpie draw shapes on the tee, (only allow the lighter colors to be used   hide the dark colors for the trunk till later) Sharpie Tie dyesharpie tie dyed
  6. Try not to use complementary colors next to each other because they will turn muddy (blue:orange, Green:Red , Yellow:purple)sharpie tie dyed
  7. Using 91% alcohol and eye dropper, drop alcohol on the sharpie.. and watch it bleed
  8. Place another cup with a  the rubber band and move cup to another area of the shirt.  Repeat the  sharpie tie dyes.. it dyes quickly minutes,  Just remove the rubber band when  the area is damp. Sharpie tied dye
  9. Repeat over and over,  and you can overlap until you finish the canopy of the tree..sharpie tie dyed
  10. Use the blow dyer if needed, to dry the upper part of the shirt

How to make the Sharpie Tie Dye Tree Trunk:

  1. Draw the trunkdrawing trunk with sharpies
  2. Make sure cardboard in between the shirt. Use the black sparingly because it does take over the tee.
  3. I recommend using alot  of goldish color in with the brown to give the bark effect,  and leave white space.drawn tree trunk with sharpies
  4. Starting from the center of the tree, drag the 91% of alcohol down the center of the trunk .. add more slowly,alcohol on tree trunk
  5. As the alcohol spreads using the blow dryer stop the bleed at the edge of the trunk.   Caution it spreads quickly.blow dyer and sharpie tree

Watch this video:

This was such a fun craft  for the kids to make as a bible story crafts  for story of Zacchaeus,  the children wore the shirts as they preformed a play.  The possibilities are endless with sharpies and alcohol .  I love this idea be sure to watch for more Sharpie crafts.Sharpie tie dyed treeskids wear tees

Have fun creating your own sharpie tie dyed tee!

Crafts: How to use a Rainbow Loom

Crafts Rainbow loom is the latest quick easy kids craft. How to use a rainbow loom, we are going to tell you how and recommend Rainbow Loom Patterns?   Rainbow Looms are the latest trend for kids this summer you use rubber bands, loom, and crochet hooks to make jewelry.   It is a great craft for your kids to make. The kids inner loop small little colorful rubber bands to make crocheted patterns.  The kids are trading the rainbow loom bracelets, think the new type of friendship bands.   Disclosure:this post contains Rainbow Loom Affiliate linksrainbow loom My daughter is loving playing with a rainbow loom it made for hours of fun.  All summer I have watched the girls at the pool use the Rainbow loom.  The child over laps the the small rainbow loom bands in a criss cross pattern, the length of the loom. Then pull the lower rubber band  with the crochet hook, through the upper rubber band causing an interlocking pattern, and use small little c hook to close the bracelets.

Rainbow loomSo on YouTube you can find some great videos of how to make all different Rainbow Looms Bracelets.  You will be amazed with the little girls that do these videos.

My favorite channel is Twistz bands .. which is now owned by Rainbow looms

Here is the link for a Basic Rainbow Loom Single Strand Bracelet Pattern

I love this fishtail pattern Rainbow Loom Bracelet

I made this Bracelet Liberty twist the blue and green one  rainbow_loom bracelet

This is a really  cool butterfly bracelet is fun to make.

My kids kids really loved the Glow in the dark Rainbow Loom Bands.  My daughter keeps on going in the closet to see if the bands glow.  My son has also enjoy making them.  The rainbow loom makes and excellent gift recommend ages is 8+.  I can also recommend visiting AC Moore for a case for the bands the case cost me $1.99, great way to organize your bands.  AC Moore also sells the bands, but they do not carry the Rainbow Loom,  yet.   You can order them through My Amazon link below for Rainbow Looms  and I have also found them at at Hallmark Stores.

Be sure to checkout Myscraps post Rainbow Looms not just for the Girls rainbow loom
girl using Rainbow Loom

Rainbow loomdisclosure affiliate
Get top beauty brands delivered to your door every month with Beauty Box 5. Click Here!
Little Passports

How To Make Natural Bug Repellent

natural bug sprayHow to make your Natural Bug Repellent So I have been researching natural ways to  avoid mosquitoes and flies from biting my family.  How to make your own  bug repellent ? So during my research I learned flies / mosquitoes hate basil and lavender.  I did more research and learned that witch hazel reduces itching.  So I decided to combined some ingredients and see what will work to deter the pests.

girl picking lavenderI went to a local lavender farm Peace Valley Lavender Farm  in DoyelsTwon PA.  I was talking to the owner and he said you know we never really have a bug issue except for the bees which pollinate our plants.   While at the farm I purchased Lavender oil.  Then I purchased sweet basil oils from a holistic healing shop that carried essential oils.   You can also purchase the essential oil online as well or whole foods.
Basil oil has an anise smell,  which is strong at first then you smell the under tones of lavender in the spray.
Witch Hazel is a anti-inflammatory and helps to reduce itching,  it also helps with pre-existing bites and sunburn to cool the burn.

This spray works great for my family. I like the idea of making a non toxic Natural Bug Repellent

Natural Bug Repellent

Ingredients:

  • 2 cups Witch hazel,
  • 2 tbl spoons 95% alcohol,
  • 20 -30 drops Lavender oil,
  • 20-30 drops Basil Oil
  • Spray bottle- which I found at Dollar Treenatural bug spray

Mix the ingredients in a spray bottle.
I have attached a PDF for the Labels please print labels on a 8.5 x11  Natural Bug Spray Labels You can print the labels and attach with Modpodge, print on a self-adhesive label, or clear packing tape.

  • This product has been tested on my family and friends.  It does work fantastic for us.  But please use at your own risk.
  • Please note .. dbl check person you are spraying is not allergic to the ingredients.
  • Avoid spraying In eyes
  • Do not drink

I also wanted to let you know if planted  Basil and Lavender around a perimeter  of a home has the same replellant affect.  Lavender does attract bees the month they bloom (late June-Aug).   Any variety of either plant Basil or lavender will repel  so  add them to picnic table décor  to keep the pest away from food.basil and lavender plants

Disclosure:  This product has been tested on my family and friends.  It does work for us.  But please use at your own risk.

 Check out My other Popular Posts :

Repaint a Swing Set

How to Fix Fitted sheets to stay in place DIY

DYI Raised Pallet Garden

Beach Memory Jars

Roasted Cauliflower a new twist on a favorite

This post may contain affiliate links
Little Passports

Beach Memory Jars

Beach Memory Jars

Beach Memory Jars This year when we went to the shore we decided to make memory beach jars  which my sister inlaw found on pintrest.  It is a great Kids Craft. We gave the kids some vintage mason jars and sent them down to the beach to get some sand and  shells.  The kids had a great time choosing. My 12 year old was like awe mom I don’t want to do it .. then he totally got in to the waves to get some pebbles and rocks for his jar. We bought the vintage mason jars with us to the shore you can find them on ebay or at a local vintage shop.

Tools:

  • Mason Jar  Tip: You don’t have to use mason jar you recycle tomato sauce jars
  • sand
  • beach items, shells drift wood
  • bowl
  • colander to strain sand
  • paper/markers
  • Picture

beach memory jar


Instructions:

  • Picture tip: The pictures we tried close and far away,  we both agreed a closer picture looks better.  I got down on to the sand and took this picture of my daughter. It make it look like she is laying on the sand in her jar.
  • We ran to CVS while we were at the shore to get pictures printed.  I actually sent them from my laptop, from the beach house to the local  CVS and picked them up an hour later.  I could choose and edit any photos prior and did not waste any time searching through my photos in store on equipment I was unfamiliar with.   For editing I use PicMonkey which is free. Picture size was 4×6″ landscape picture.

girl laying in the sand

  • When you fill the jars with sand you need 1/4 of a jar of sand.  Then the add the shells, drift wood, and stones,  what ever is memorable for that beach.

  • We also make label with the beach name and year.beach jars

The tricky part was putting all the elements in the jar.

  • I ended using a bowl and strainer/colander  empty our the sand,  adding the sand with a large spoon,
  • Add front label tilting the jar with tongs and adding more sand slowly.
  • Then tilt the sand towards the front and add the picture.
  • Ten add your shells, stones, drift wood, and maybe small toys (legos, trinkets from the boardwalk)

The moms did a beach memory with the entire family.

beach memory jar

We then took a picture with the kids and their Jars. kid with his beach  jar

Have a great time perserving your memories.

How to Repaint a Front Door

Front door

How to Paint a Front door.  So I decided I need a fun spring make over to my Front door.  I wanted a Pop of color for spring an liven up my front door.   So off to th store to buy paint an spray paint.  I decided to paint the benches and add flowers.  I love color it can total change your mood.

How to Paint a Front Door

Before I had a boring entrance. front door

Tools:

  • Drop cloth
  • Exterior Paint A pint was enough to do the door
  • Small roller
  • Paint brushes
  • Painters Tap
  • If doing benches (3 -4 cans of spray paint)

The project total took about 3 hours with benches:

  1. Wash front door with Fantastic or a cleaner and paper towels to remove and oil and dirt from every day use and allow to dry.
  2. I started with the front door since It need to be closed at some point.  I taped newspaper/or a drop cloth to the floor in side
  3. Removed the door handle and lock I taped the window and Mail slot since they could not be removed.
  4. You could take the door off the hinges,  I was not planning to do both sides I decided to leave it up.
  5. I did 2-3 coats allow to dry between.Door

How to Repainting Outside Chairs and Benches

While I was wait for the front door to dry i painted my Chair and benches.  if you don’t have benches be sure to Check out thrift stores.  Or you might see one someone has toss to the curb.

Be sure to use a stiff wire brush to loose any metal.

Then tape off the area you don’t want painted and spray.  I also moved to a side part of my law where the over spray does not get on the house.

Here is a Step By Step:repainting a benchThen I did the chair which took less than 10 minutes:

outside chair So that is my Spring makeover to my front entrance.  I love the pop of color.  I added a new door mat and flowers.  A wreath is a pop of color.  This door I know looks bright.  I did this project last year and I have lived with it for over a year.  I have to say I still love my door.  I always can tell people which house is mine.  The door goes well all year long.  In the summer a bright sunflower Wreath,  Fall : orange flowers looks great and in winter Reed and white or a Pin wreath pops.  bench bench

What project do you have lined up for spring?


American Girl Doll Picture Frame

American girl picture frameHow to make an American Girl Doll Picture. This is a great craft idea for an American girl party favor or a girls craft project.  It is a easy project for your daughter to make.  We used the catalog the American Girl Doll catalog for the pictures and verbage.  My daughter love learning how to make this American girl craft.  She help cut out the pictures, and planed out the lay out herself.

Materials For an American Girl Picture Frame:

  • Wooden Frames I got mine from AC Moore for $1 each they also have one with Mirrors so you can do a Mirrior instead of a fame.
  • Mod Podge
  • Brush or foam brush (you can buy in bulk $6-7 for 10 foam brushes)
  • Roller or sponge
  • scissors
  • Pink Spray Paint or Acrlich paint
  • American Girl catalog


how to make a american girl picture frame

Instructions to make an American Girl Doll Picture Frame:

  1. Remove the picture area from wooden frame.
  2. 1 day Prior With adult supervision spray paint or paint  the wooden frames so they have time to dry.  I was doing many frames so spray paint was easier for me.
  3. Cut out pictures from the catalog
  4. Plan out layout of  the American Girl pictures
  5. Apply the Mod Podge where you want the picture to go.
  6. Carefully place down picture the catalog is thin so do not over apply Mod Podge and whee you put it down it stays you can move the pictures.
  7. Be sure to roller or with a sponge careful smooth out the picture removing all air bubbles out from under the pictures.
  8. You can layer the pictures long as you apply the Mod Podge under the image.  It will dry clear
  9. After getting all the images applied coat of Mod Podge  over the entire surface,  to see the frame.
  10. When you are done on any corners where the pictures wrap on the the edges you can use a light sand paper  to smooth out the edge and making a more finished look.

This is a great inexpensive craft for a American Girl Party Favor $2.70 per kid.  With the cost being under $27 for 10 frames  (that is the spray paint $4 Frames $10, brushes $6-7 bulk, and Mod Podge $8.00).

I also think this is fun craft with boys as well get the Lego catalog.

Check out my other post on easy sewing for American Girl Dolls Free patterns.

Also be sure to follow my American Girl Doll Ideas on Pinterest.

I am Linking the Post up to Barbs’ Fabulously Frugal Thursday 

How to Apply Glitter Tattoos

glitter tattoosMy daughter had some friends over and we did Glitter tattoos body art.  I love glitter tattoos stay on for a week, even with regulars baths. The girls loved them and once you know how to properly apply the glitter Tattoos.. they are fun to do.  They all had fun choosing glitter Tattoo designs stencils.

We did do The glitter Tattoo Body art  outside because you do use a brush to remove the excess glitter, it tends to get every where.  But you can use a towel to catch the tattoo glitter,  if the weather questionable.

I purchased a full Glitter Tattoo kit from which included the Brushes adhesive, tattoo,  and Glimmer Body Art Tattoos from ThePartyworks.com  it was 18.99.  which was reasonable since I found them for over $25 at a local store.

How to apply Glitter Tattoo Body Art

  1. You have to peel off backing and apply self adhesive tattoo stencil  to clean skin.Tattoo Stencil
  2. Then apply adhesive over the skin over lapping on to the tattoo (allow the  adhesive to dry,  it will be tackyapplying body adhesive
  3. Apply the glitter to the adhesive  with the small brush.. a little goes a long way so do over load brush with glitter,  because it will get wastedapply glitter to tattoo
  4. Apply other colors if doing 2 toneglitter on tattoo
  5. Using large brush,  dust away loose glitterglitter tattoos
  6. Slowly removed tattoo stencil peeling back from a corner.removing stencilglitter Tattoo body art

I did about 24 Body Art Glitter tattoos and still have a ton of glitter yet.  I did purchase extra adhesive body glue just in case.

I love this idea and so did the girls great idea for a girls birthday party.  Be sure to have extra helpers.

Be sure to check out ThePartyWorks.com shipping offers for free shipping.

Disclosure: This post contains Affiliate Links to help the cost associated with running this blog.

Making American Girl Doll Clothes

American girl dollMaking American Girl Clothes: As a girl as soon as I could sew I made doll clothes.   So I am loving making American  Girl doll clothes for my daughter.  American Girl doll clothes are great you can use the scraps of fabric you have in your fabric piles.  I found this fabric in my stash even the fur.   This is what I created for my daughters Marie Grace American Doll. I also made a matching outfit for the girl next door American Girl doll.  So their dolls can be twins.

american girl

I made my patterns but there are some great online pattern for American Girl clothes.  Some are Free

Places that offer free or purchase Patterns for you to make American Girl Doll clothes

Also me sure to check out my 18″ doll and American Girl Pintrest board for some great American Girl clothes I found on the web.

I Purchased this Sweater set from an Etsy Seller HeavenSentHandmade. so you can always buy some American girl clothes.   Be sure to follow my blog for great new places to buy AG clothes.knit sweater for american girlSo what clothes are you going to try to make?